

Why Cable Clutter Destroys Living Room Design Before You Even Start
You’ve arranged your living room exactly how you want it. New media console. TV mounted at the right height. Accent wall looking sharp behind it. Then you step back, really look, and see the cascade of black cords snaking from the TV down to the console — disappearing into a knot of adapters and power bricks you forgot existed.
That’s the moment most living room renovations quietly fail.
Cables aren’t just ugly. They dictate furniture placement in ways most people don’t recognize until they’re already living with the problem. Each cable is a tether with a fixed radius. Your PS5 can only go where the HDMI cable reaches. Your soundbar has to stay within six feet of the TV. The streaming stick becomes a permanent fixture you can’t relocate without unplugging half the setup. Suddenly your “flexible” furniture arrangement isn’t flexible at all — it’s locked in place by cord physics.
What Cables Do to Furniture Placement
The average home entertainment setup runs six to eight separate cables: HDMI from the gaming console, optical audio to the soundbar, power cords for the receiver, the streaming device, and whatever’s plugged directly into the TV. Each one has a maximum reach. Together, they form a mesh that keeps every device anchored within a fixed zone.
This gets brutal with open shelving. You mount floating shelves flanking a fireplace, they look gorgeous in photos, and then you try to make them functional. Add electronics, and you’re routing cables through walls or accepting visible cord runs across a beautifully plastered surface. Neither outcome matches what you actually had in mind.
Most people rearrange living rooms two or three times a year. Cables make that annoying enough that you stop doing it.
Why Cord Covers Just Relocate the Problem
Cable raceways, cord covers, cable sleeves — they all do the same thing. They make your cables slightly less visible while keeping the underlying constraint intact. The D-Line half-inch raceway (about $20 for a five-foot kit at Home Depot) looks cleaner than bare cables. But you’re still physically tethering devices to fixed positions.
And they require commitment. You’re adhesive-mounting or painting these covers to walls and baseboards. Moving a device later means starting the whole process over. For renters, this often isn’t even an option.
The Vertical Cable Run Nobody Budgets For
Even with a perfectly organized media console, there’s one cable run that remains stubbornly visible: the vertical drop from a wall-mounted TV down to the console below it. It’s the first thing guests notice. Professional installers route this run through the wall — a job that typically costs $150–$300 in labor and requires cutting into drywall. No media console, no cable sleeve kit, and no amount of furniture rearranging eliminates this run. It requires either in-wall routing or removing the cable requirement entirely.
That last option is where wireless display technology comes in. But before getting there, planning the layout correctly saves a lot of money and effort.
Planning an Entertainment Wall Before Buying Anything
Skip this step and you’ll buy a media console that doesn’t fit your TV width, or pick a mounting height that leaves you craning your neck from the couch. Do it once, correctly, and every subsequent purchase decision becomes straightforward.
Step 1 — Measure Everything, Including What’s Behind Things
Start with the TV’s physical width (not diagonal size — the actual width edge to edge). Your media console should be at least as wide as the TV, ideally slightly wider. A 65-inch TV has a physical width of roughly 57 inches. Pair it with a 48-inch console and it looks unbalanced from across the room.
Check your wall’s stud spacing and any electrical outlet positions. Outlet placement determines where power strips need to go, which affects which side of the console faces the wall. Sketch this out with real measurements before ordering furniture online.
Step 2 — Map Every Device and Its Access Frequency
Make a quick list sorted by how often you touch each device:
- Daily: gaming console, streaming remote, laptop used as a source
- Weekly: Blu-ray player, AV receiver volume, cable box
- Rarely: older consoles, secondary audio hardware, power conditioners
Devices you use daily belong in open, accessible spots — not buried behind cabinet doors. Devices you touch rarely can go in closed storage where they’re out of sight. Getting this wrong is how you end up constantly opening and closing cabinet doors just to turn on the TV.
Step 3 — Mark the Distance Between Your Source Device and Your Display
This one step determines whether you need wireless display transmission at all. If your laptop or PC sits on the media console directly below the TV, a short HDMI cable is fine — buy a Monoprice 4K HDMI cable (6-foot, $8) and call it done. If your source device lives on a desk across the room, or in an adjacent room you use as a home office, running a cable becomes genuinely impractical. Measure that distance. Write it down. That number matters when evaluating wireless hardware specs.
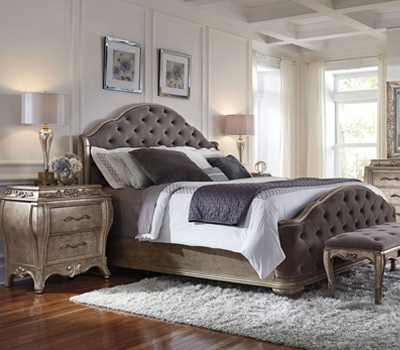
Furniture That Actually Helps You Manage Cables
Not all media consoles handle cable routing the same way. Here are real options at different price points, evaluated specifically for cable management — not aesthetics or brand prestige.
| Furniture Piece | Price | Cable Management Features | Best For |
|---|---|---|---|
| IKEA BESTÅ TV Storage Combination | $249–$450 | Back panels with cord cutouts, adjustable internal shelves, optional push-open doors to hide devices | Budget setups, IKEA-hack customization, renters |
| West Elm Modern Media Console (58″) | $799 | Built-in cable holes on back panels, solid wood doors, three adjustable shelves with ventilation gaps | Mid-range, contemporary living rooms |
| Crate & Barrel Miles Media Console | $1,299 | Rear-access cable port, perforated metal back panel for simultaneous cord routing and device ventilation | Premium setups with high-heat electronics like AV receivers |
| IKEA KALLAX (repurposed as media storage) | $89–$185 | Open cubbies, requires separate cable management inserts (Signum cable basket, $10) | Gaming setups, frequent reconfiguring |
| Walker Edison Rustic Farmhouse Console | $189 | Open back design, side cord holes, two barn-door panels for concealment | Farmhouse aesthetic on a tight budget |
The IKEA BESTÅ system wins on flexibility. You configure the internal layout to match your actual devices, the cord management is designed into every unit, and the total cost stays under $400 even for a wide configuration. The West Elm console looks sharper out of the box but costs three times more for mostly the same functional outcome.
What no console solves: the vertical cable run from the TV down to the console. That gap — typically 12 to 24 inches of exposed wall — is visible from every seat in the room. Furniture addresses what’s inside and below the console. The wall between the TV and the console is a separate problem that requires a different solution.
Wireless Display Tech Is the Only Real Answer to the Console-to-TV Cable Problem
Every cable management product makes cables less visible. Wireless display technology removes the cable requirement entirely. That’s a fundamentally different outcome, and for a wall-mounted TV setup, it’s the cleaner solution.
When your display source connects wirelessly to your TV, the entire TV wall stays clean. No HDMI cable running from the console to the TV. No cable pinned along the baseboard or routed through the wall. The TV just receives a signal. The console, the laptop, the PC — they live wherever you want them, independent of where the TV is mounted.
What the Lemorele USB-C Wireless Kit Does
The Lemorele Wireless USB-C Transmitter and HDMI Receiver Kit is a two-piece system. The USB-C transmitter plugs into any laptop or tablet that supports DisplayPort Alt Mode. This covers most modern MacBooks (2016 and newer), Microsoft Surface devices, iPads with USB-C, and USB-C Android tablets. The HDMI receiver plugs into your TV or projector’s HDMI input port.
Once both units are powered, they connect automatically. No pairing buttons. No software install on your laptop. No app to configure. The signal transmits over 5GHz and delivers 1080p at 60Hz with latency around 100ms — perfectly usable for streaming, presentations, and casual gaming. The rated range is 50 meters (164 feet), which covers any standard room size and most open-plan layouts. At $62.69, it costs about the same as a professional in-wall cable routing job, but takes 30 seconds and leaves no holes in your drywall.
What 50M Wireless Range Means in a Real Apartment or House
50 meters is the open-air spec. Drywall cuts effective range by roughly 30–40% per wall. In a typical room, you’re looking at reliable transmission through one or two interior walls — enough for same-room use or transmitting from an adjacent home office to a living room TV. Concrete walls or homes with dense insulation will see more signal reduction. In those cases, repositioning the receiver unit by two or three feet often restores a clean signal — you’re looking for a sightline with fewer dense materials in the path.
When the HDMI-to-HDMI Version Makes More Sense
Not every source device has USB-C with DisplayPort Alt Mode. Desktop PCs with dedicated GPUs output via HDMI or DisplayPort. Gaming consoles, cable boxes, and media servers all use HDMI natively. For those setups, the Lemorele Wireless HDMI Transmitter and Receiver at $55.99 connects via HDMI on both the transmitter and receiver ends. It shares the same 5GHz/1080p/60Hz spec but adds a significantly longer rated range — up to 656 feet in open air — which makes it the better fit for larger homes or multi-room transmission. Same plug-and-play setup, different connector type. If your primary source is a laptop or recent tablet, the USB-C version is cleaner to use. If you’re running HDMI sources, the HDMI version removes any need for adapters.
Setting Up Wireless Display in a Living Room: Exact Steps
This is for the USB-C transmitter kit with a wall-mounted TV and a laptop as the source device. The HDMI version follows the same sequence — just substitute “HDMI transmitter” for “USB-C transmitter” in each step.
- Set up the receiver at the TV first. Plug the HDMI receiver unit into an available HDMI port on your TV. It draws power via a short USB cable — connect that to the TV’s USB port if available, or to any 5V/1A USB adapter. The receiver needs to be powered before the transmitter connects.
- Switch your TV input to the HDMI port where the receiver is plugged in. You should see a standby screen indicating the receiver is waiting for a signal.
- Connect the transmitter to your laptop. Plug the USB-C transmitter into your laptop’s USB-C or Thunderbolt port. On MacBooks, either USB-C port works. On Windows laptops, verify your port supports DisplayPort Alt Mode — if the port has a Thunderbolt logo or if your laptop charges via USB-C, it almost certainly does. Dell XPS, HP Spectre, and Lenovo ThinkPad X-series models from 2019 onward all support this.
- Wait 10 seconds. The transmitter and receiver locate each other over 5GHz automatically. Your TV screen mirrors your laptop. No button press required.
- Set your display mode. On Mac, go to System Settings → Displays to configure extended or mirrored output. On Windows, press Win+P to cycle between Duplicate, Extend, and Second screen only. For a home theater setup where you want the TV to show what’s on the laptop, Duplicate works. For using the TV as a second monitor while working, Extend is more useful.
- Step back and look at your wall. The TV has a small receiver unit attached to one HDMI port and a short USB power cable running to the TV’s USB port. That’s the only visible hardware. No cable running down the wall. No HDMI cord across the floor. Your laptop sits wherever you placed it.
Common issue worth knowing: if signal drops occur, especially in buildings with dense 5GHz WiFi from neighboring units, try repositioning the receiver unit to face more directly toward the transmitter. The 5GHz band handles interference better than 2.4GHz overall, but physical line-of-sight still improves performance in congested RF environments. Small adjustments — even rotating the receiver unit by 90 degrees — can make a measurable difference.
Wired vs. Wireless for Living Room Setups: The Direct Answer
If your source device sits within six feet of the TV and never moves, buy a Monoprice 8-foot 4K HDMI cable for $8 and skip wireless entirely. Wireless display tech pays for itself when the source is mobile, located across the room, or when eliminating the vertical cable run between a wall-mounted TV and a console below it matters to you. That’s the actual decision boundary.


")